How to Safely Upgrade to macOS Ventura and Enjoy the Experience
Time flies, and another year has gone by. Remember thinking 2020 was a year with a virus? If you’re curious, yes, BeLight does operate in Ukraine, and we have no intention of stopping!
But, the best things in life should stay the same, so Apple releases a new system every autumn, no matter what. And we’re truly grateful for that! So, the upcoming one is called Ventura. Did you know that Ventura refers both to a city (with the full name of San Buenaventura for a Spanish version of a saint’s name) and to a county in the sunny state of California? The system rolls on with the much-hyped slogan of “Works smarter. Plays harder. Goes further.” So, let’s do exactly this in the upcoming macOS Ventura exploration!
Let’s Work Smarter, Play Harder, Go Further With the Upgrade to macOS Ventura
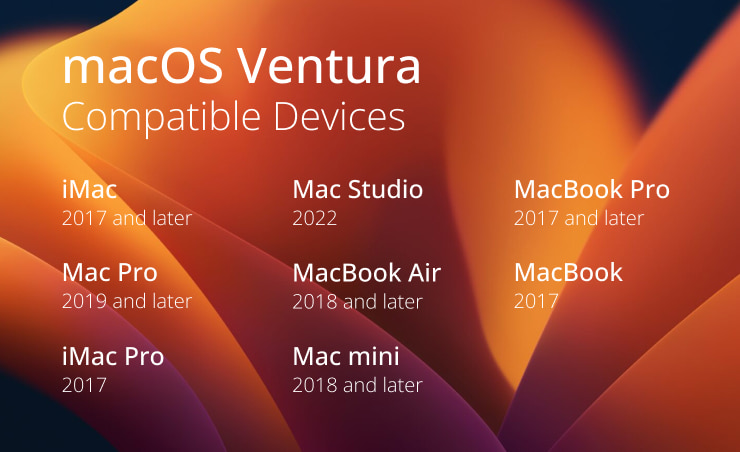
Compatibility is the king, and Apple knows how to play the perfect chess game! This year, the models from years 2014 through 2016 became incompatible, so only 2017 and later Macs will adopt Ventura when it’s released this fall. A full list of Macs that can run macOS Ventura are found on the official website.
As you might have noticed, Apple strives to make all the systems (macOS, iPadOS, iOS, watchOS, tvOS) closer to each other both in features and design. So, Ventura turns your System Preferences into System Settings, and they get more of a mobile device vibe. Moreover, such mobile apps as Weather and Clock also migrate to macOS Ventura.
This year’s unique and powerful feature for all types of busy people with Macs is refurbished Mail. This offers huge improvements on the search and the ability to undo sending of the email in the first ten seconds when the paralyzing thought, “What have I done!”, strikes like a lightning bolt through your brain. Spotlight has been improved considerably, both in functionality and design. Safari became even quicker, thus becoming the world’s fastest browser and again even more secure, so no worries for the next online purchases and conquering the world plans (you can also leave the last box unticked, for which we’ll be eternally grateful). Stage Manager offers you a new way to work with all the apps at your fingertips right on one screen, so now you’re free to create your perfect working environment.
Photos now offers iCloud Shared Photo Library with access for up to five people, so there are no worries that all the grandparents see their grandchildrens’ photos too late. And, you can be at peace because you always choose what to share with family members, and all the changes get synced in the blink of an eye.
For those who did not get enough use out of the Mac’s built-in camera, Apple provided the use of your iPhone as a webcam with the Continuity Camera. And no more wires—works like a charm. Bloggers can now show off their desk arrangement with the Desk View, which mimics an overhead camera.
Great news for gamers with accelerated performance and Shared Play with a redesigned Game Center dashboard. Freeform will be introduced later with the Ventura update, but it seems it will soon become the perfect space for collaborative work and brainstorming with the highest productivity possible.
Every year, the array of the new system’s perks is overwhelming, but let’s move on to the upgrade as we’ve dwelled upon the most prominent ones.
How to Upgrade to macOS Ventura
Forget about upgrading the system before making all the necessary backups. You can thank us later, but now make a backup of all the valuable data you wish to safely migrate from one system onto another. Not sure what to choose for this job?
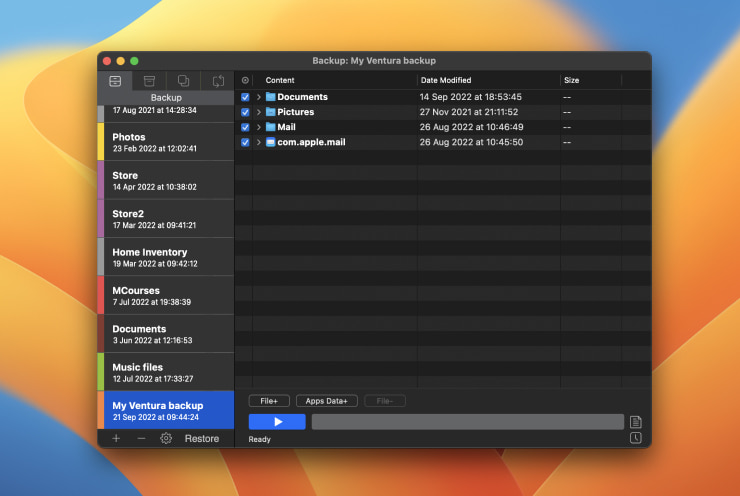
Get Backup Pro is here to help. It can unload your burden with:
- saving all your precious files;
- having different backups in different places;
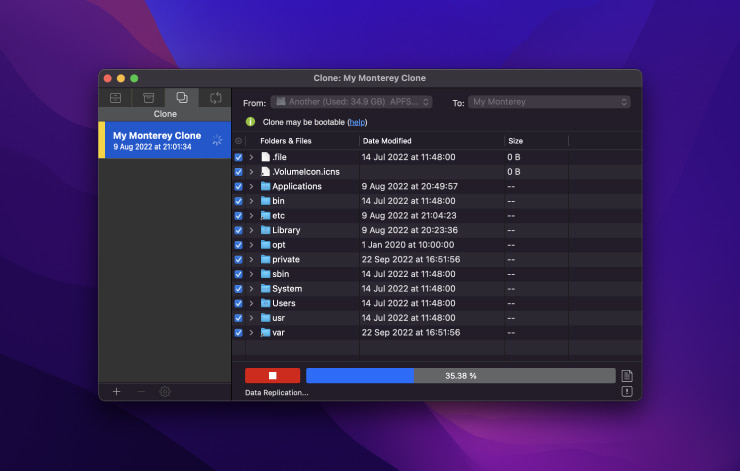
- creating a bootable backup to restore the previous system.
You can download Get Backup Pro free trial of full features to prepare for the Ventura upgrade. The new feature is the support of cloning on both Apple silicon or Intel processor Macs. macOS Ventura is making the security requirements even stricter; thus, we see Apple making more and more things unavailable to the curious user while maintaining an unparalleled level of system security.
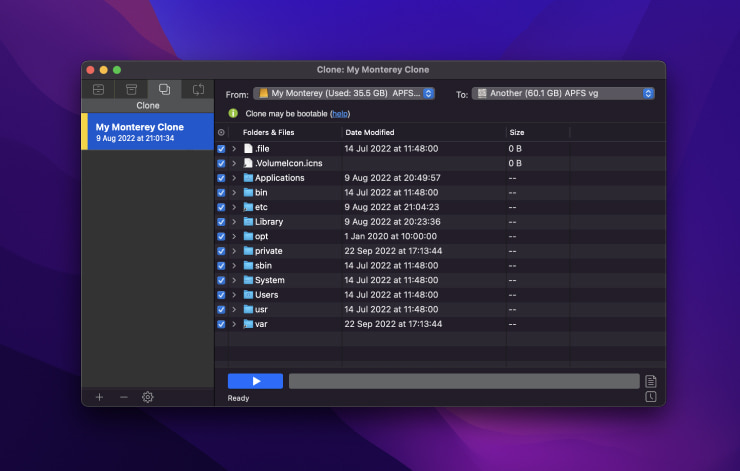
All the users love Scheduled Backups, as they provide the ease of mind and assure that all the backups will be up-to-date without your constant attention. A bootable clone of your disk allows you to retrieve all your data, and even the whole system, just the way you cloned it. But, now you’ve got an even greater opportunity to transfer the files you need—to back up the Data Volume. With it, you don’t have to clone all the info you have on your device, but only the important user Information. More on the Get Backup Pro features and your backup adjustments can be found in the instructive article How to Backup Mac.
I Upgraded and Hate It! Now What?
How can anyone hate the new system? So beautiful, the colors so saturated and even an iPhone as your Continuity Camera! Think twice before answering, as the reasons may vary from user to user, but some of them make full sense and are enough to make you eager to switch back.
So, if:
- you lost access to some of the apps that have not been updated to macOS Ventura;
- you strive with the well-known apps that have lost their usual touch and feel;
- you don’t feel comfortable with the new way your device looks;
- or your Stage Manager drives you mad, let alone if the device freezes or lags.
In all of these cases, you know that Get Backup Pro didn’t take all that space for your backups for nothing. Let’s check out our options below.
A Perfect Monterey Comeback
Before downgrading back to macOS Monterey, make sure you’ve made backups of the work done on the new system or made a backup of the Data Volume. It’s essential not to lose anything with the move, even if the move is to the previous system. Thus, you are making sure none of the work done is lost and spare yourself the doubled frustration of going back and forth with the systems while losing some data with every step.
Now you have the Ventura backup (or Data Volume backup) and previous Monterey clone the way you left the old system. High time to use them both in the right order:
- Boot from the Monterey clone.
- Format the container where Ventura is on your device now (everything there will be erased) in APFS.
- Start Get Backup and now clone your Monterey system in the new APFS container on your computer.
- Reboot into the “new old” system.
After that, you can add your backed-up data from Ventura to get all your work in sync.
Works like a charm on every system!
Julia Shtelmukhova
Published: September 2022